June?! Wow. I am SO very sorry for keeping you all on the edge (of glory- sorry music brain is in gear right now) of your computers!
For those of you who have not given up on me yet: THANK YOU SO MUCH!!!
Good news: I am working on a new Pokemon pattern!! It should be finished by the end of the month!
Bad news: I'm in another play - this time a musical which requires more of my not-so-free time - and it won't be over until December.
Good news: I've been working on my new pattern whenever I can and it's starting to look good.
Bad news: 'Whenever I can' is starting to look like in the middle of the night!
Good news: Once this play's over I can finish my new pattern and work on the second Pokemon pattern I have planned!
Bad news: My life is so hectic. AND it's almost Christmas!!
Okay, so that's just a few of my problems. I'm also participating in two swaps on Ravelry and have to swap with three people. That means two Pokemon amigurumi and one pair of fingerless gloves. I will pull through!! Thank you all for your continued support! I love it when I come on the computer and see a new message or email from someone complimenting me on my patterns! You guys are the best T^T
My Youtube videos have been put on hold for a long while and recently my sister and best friend have been asking me "When can Snorlax have another video made?". The answer: I am working with my sister on Snorlax plans. She has written some hilarious songs for the Plushie Park to sing and we're working on new additions. He will likely make an appearance in time for Christmas. I just need to find money to buy a new SD card for my video camera. My goal is to crochet all Pokemon whether I be 16 or 57 by the time I finish. No matter how many generations they make, I will be right behind them crocheting faithfully.
One last bit of information you might find interesting: I am working on other amigurumi patterns other than Pokemon. I have the head of a chibi anime/manga doll made, just waiting for a body. He'll most likely be finished sometime next year, if I have time.
And now I leave you to wonder what Pokemon I am making and if it will be 5 months before I write here again. I will try my best to keep you all updated on how the patterns are coming along. Until we meet again, Oh Faithful Viewers. Muhahahahahahahhahahaha!

A place for amigurumi both big and small!
Friday, November 2, 2012
Wednesday, June 27, 2012
Any suggestions?
It's been a hot and busy Summer and I'm about ready to begin crocheting again! I posted on our Facebook page which Pokemon would you like me to make next and I got two responses: Totodile and Absol. I have thought very hard about the basic shapes and I have decided that I will make them once I get money to buy the right colors. But before I do I would like to ask the same question here. So, any suggestions?
Sunday, May 13, 2012
The Psychic/Ice type Johto Pokemon, Jynx

Hi guys, thanks for waiting! It took me three weeks to make Jynx and now she's finished! I was running out of red yarn, so her dress isn't as long as I wanted it....And she's not as pretty as I'd hoped.....But at least she's all in one piece! lol!
If you find anything amiss with the pattern then please email me, comment on this post, leave a post on the Facebook page, or send me a Ravelry message. Also if you'd like to, post a picture of your finished Jynx on the Facebook page! I would love to see them all!
Well no more dawdling! Onward to the pattern!
JYNX
Materials:
WW yarn in purple, yellow, red, gray, and cream(I used Red Heart Aran, Purple, Bright Yellow, Red, and Light Gray)
Size G (#6 or 4.00 mm) crochet hook
Yarn Needle
Polyester fiberfill (pillows work just as well!)
Scissors
Felt in White, Pink, Brown, and Black
Gauge isn't that important, just so long as your stitches are tight so that the stuffing won't show or fall out.
The (parentheses) at the end of each Rnd/Row indicate the number of stitches at the end of that Rnd/Row.
I work in continuous rounds (aka spiral rounds), but if your prefer to join at the end of each round that's fine. I also decrease in front loops only because I've heard that it makes the decrease stitch less visible.
If you don't know what a Magic Ring is don't panic! It's also called Magic Loop or Magic Circle. Here's an alternative: If the pattern says 6 sc in Magic Ring you can ch 2 and 6 sc in 2nd ch from hook and join stitches. I prefer working with a Magic Ring because you can pull it as tight as you want so that the stuffing won't show. Most people I have tried to teach the Magic Ring to throw their crochet hooks and yarn on the floor in a huffy, but I myself find it fairly easy depending on how many stitches is in it. If you'd like to learn how to make one I found THIS LINK very helpful. The only person I've had success with teaching is my sister. Just use whatever you feel most comfortable using.
- sc -- Single Crochet
- sl st -- Slip Stitch
- hdc -- Half Double Crochet
- dc -- Double Crochet
- tr -- Triple Crochet
- dtr -- Double Triple Crochet
- dec -- Decrease over next 2 stitches
Try not to get confused with any of these techniques. If you need any help please contact me via any of the above mentioned means.
Rnd 1: 6 sc in Magic Ring (6)
Rnd 2: 2 sc in each sc around (12)
Rnd 3: sc in 1 sc, 2 sc in next sc around (18)
Rnd 4: sc in 2 sc, 2 sc in next sc around (24)
 Rnd 5: sc in 3 sc, 2 sc in next sc around (30)
Rnd 6: sc in 4 sc, 2 sc in next sc around (36)
Rnd 7: sc in 5 sc, 2 sc in next sc around (42)
Rnd 8: sc in 6 sc, 2 sc in next sc around (48)
Rnd 9-17: sc in each sc around (48)
Rnd 18: sc in 6 sc, dec over next 2 around (42)
Rnd 19: sc in 5 sc, dec over next 2 around (36)Rnd 20: sc in 4 sc, dec over next 2 around (30)
Rnd 21: sc in 3 sc, dec over next 2 around (24)
Rnd 22: sc in 2 sc, dec over next 2 around (18)
F/O. Stuff moderately firmly and leave opening as is. Weave in end.
Hands: (make 2) using purple,
Rnd 1: 6 sc in Magic Ring (6)
Rnd 2: 2 sc in each sc around (12)
Rnd 3: sc in 1 sc, 2 sc in next sc around (18)
Rnd 4: sc in 2 sc, 2 sc in next sc around (24)
Rnd 5-6: sc in each sc around (24)
Rnd 7: sc in 2 sc, dec over next 2 around (18) Begin stuffing lightly
 Rnd 8: sc in 1 sc, dec over next 2 around (12)
Rnd 9: dec over next 2 around (6)
F/O. Weave end in last round and pull to close.
Fingers: (make 8 -- 4 for each hand) using purple,
Rnd 1: 5 sc in Magic Ring (5)
Rnd 2-5: sc in each sc around (5) Stuff lightly
F/O. Weave in end. Sew to hands.
Rnd 1: 4 sc in Magic Ring (4)
Rnd 2-4: sc in each sc around (4)
F/O. Weave in end. Sew to hands.
Chest: (make 2) using red,
Rnd 1: 6 sc in Magic Ring (6)
Rnd 2: 2 sc in each sc around (12)
Rnd 3: sc in each sc around (12)
Rnd 4: sc in 1 sc, 2 sc in next sc around (18)
Rnd 5: sc in 2 sc, 2 sc in next sc around (24)
Rnd 6: sc in each sc around (24)
F/O. Make the 2nd one then do the following:
Attach yellow yarn to stitch of last round on one.
Rnd 1: sc in 3 sc, 2 sc in next sc around (30)
Rnd 2: sc in 4 sc, 2 sc in next sc around (36)
F/O. Copy for second one. Sew the two yellow parts together as shown in the picture. Sew to dress.


Dress: (cylindrical shape) using red,
Note before you start: before beginning, cut a length of red yarn long enough to sew the dress to the head. When you get to around Rnd 9 sew the dress to the head, lining up the hole at the top of the dress with the hole in the head. Continue working on dress with it sewn together.
Rnd 1: ch 30, join to first ch st (30)
Rnd 2: sc in each sc (30)
F/O. Join yarn to other side of foundation ch and continue working.
Rnd 3: sc in 4 sc, 2 sc in next sc around (36)
Rnd 4: sc in 5 sc, 2 sc in next sc around (42)
Rnd 5: sc in 6 sc, 2 sc in next sc around (48)
Rnd 6: sc in 5 sc, 2 sc in next sc around (56)
Rnd 7-14: sc in each (56)
Rnd 15: sc in 6 sc, 2 sc in next sc around (64)
Rnd 16-20: hdc in each sc around (64)
Rnd 21: in Front Loops Only, *dc, tr, dtr, tr, dc, hdc* around to last 4 st then dc, tr, dc, hdc. F/O. Join yarn to back loop of Rnd 21.
 Rnd 22: sc in 6 sc, dec over next 2 around (56)
Rnd 23: sc in 5 sc, dec over next 2 around (48)
Rnd 24: sc in 4 sc, dec over next 2 around (40)
Rnd 25: sc in 3 sc, dec over next 2 around (32)
Rnd 26: sc in 2 sc, dec over next 2 around (24)
Rnd 27: sc in 1 sc, dec over next 2 around (16)
Rnd 28: dec over next 2 around (8)
F/O. Weave end in last round and pull to close.
Arms: (make 2) using gray,
Rnd 1: 6 sc in Magic Ring (6)
Rnd 2: 2 sc in each sc around (12)
Rnd 3: sc in each sc around (12)
Rnd 4: sc in 1 sc, 2 sc in next sc around (18)
Rnd 5-6: sc in each sc around (18)
Row 7: sc in next 9 sc, leaving remaining 9 sts unworked. Do not ch1, turn (9)
Row 8: sl st in 1st sc, sc in last 8 (9)
Rnd 9: sc in each sc across then sc in unworked 9 sts (18)
Note: You are now working in a circle again. This technique was used for Snivy's pattern as well. Please note that there will be small holes on each side where you did this technique. I sewed them shut after fastening off to prevent stuffing from showing.
 Rnd 10-12: repeat rows 7-9 (18 at end of Rnd 12)
Rnd 13-14: sc in each sc around (18)
Rnd 15: sc in 1 sc, dec over next 2 sc around (12)
Rnd 16: sc in each sc around (12)
Rnd 17: dec over next 2 sc around (6)
F/O. Weave in end. Sew an elbow crook on each arm. Use the pictures for guidance.
Arm Bumps: (make 4 -- 2 for each arm) using gray,
Rnd 1: 6 sc in Magic Ring (6)
Rnd 2: 2 sc in 1st st, sc in next 2 sc, 2 sc in next sc, sc in last 2 (8)
Rnd 3: 2 sc in 1st st, sc in next 3 sc, 2 sc in next sc, sc in last 3 (10)
F/O. Sew to arms where the elbows would be.


Assembly:
Sew the hands to the arms and then sew the arms to the dress. The hair was probably the most complicated of the body parts. I used a technique that some of my friends showed me. Here is the link. If you have any trouble please contact me and I'll be glad to help. Here are some pictures of what the hair looks like.


Jynx and Pokémon are © Nintendo.
This pattern is an original pattern by Gemma Taylor (May 2012). Please don't claim this pattern as your own. If you want to share this pattern, I give you permission to link to it if you'd like, but please don't repost/reprint the pattern on your website. You can print and keep a copy for your own personal use (I like doing this myself), but you cannot sell, distribute it, or sell items made from this pattern in any way possible without permission from moi. Thank you! :D
Saturday, April 14, 2012
Leibster Awards!!
I got my first Leibster awards from Nanette Crochet and Marmokachi! I want to thank them both for giving me this award! The Leibster award is given to people who have less than 200 followers to make them more poular. I'm very thankful that these people who I ADORE gave me this award! There are a few conditions for accepting it.
1. Show your thanks to the blogger who gave you the award by linking back to them.
2.Post the award on your blog.
3.List the bloggers you are giving the award to with links to their sites.
4.Leave comments on their blogs so they know about the award.
5.Share five random facts about yourself that people don't know about you.
So here's who I award the Leibster award to:
Kim
Kat
Calavera
Hanako
And I don't know if Wordpress accounts count as blogs, but I'm giving my last award to ShearViscosity for her awesome Eeveelutions she made!
And now for my five random facts!
1. I visit the library every week to get a new fantasy book to read.
2. I LOVE acting. In fact, it's what I want to pursue in the future!
3. I love watching anime. My favorites include Ouran High School Host Club, Fruits Basket, XxxHolic, Tsubasa: Reservoir Chronicle, and Romeo X Juliet.
4. Apart from Pokemon, I also love Legend of Zelda and Mario. I have crocheted several Zelda characters and Mario characters.
5. If it wasn't for my best friend, Austin, I never would have created Austin the Owl and this blog. He asked me to make him an owl and I couldn't find a good pattern that was quick so I made my own! I named the owl in his honor and created this blog shortly afterwards. A BIG thanks to Austin, who I really like! Love you Austin!
Thanks again for giving me this award guys! Without my fans I don't know where I would be! I never imagined my blog being this popular! Thank you so much!
Thursday, March 22, 2012
I'm here....with a sneak peak!
I still exist in this world! lol! I'm just very busy. I'm involved in a play at my local theatre and that's taking up most of my time. Adding to that is my Physics report that due in 2 weeks, the gift I'm knitting for my director, and a birthday present for a friend I'm crocheting. But here's a sneak peak of the Pokemon I'm working on making next!

Saturday, January 21, 2012
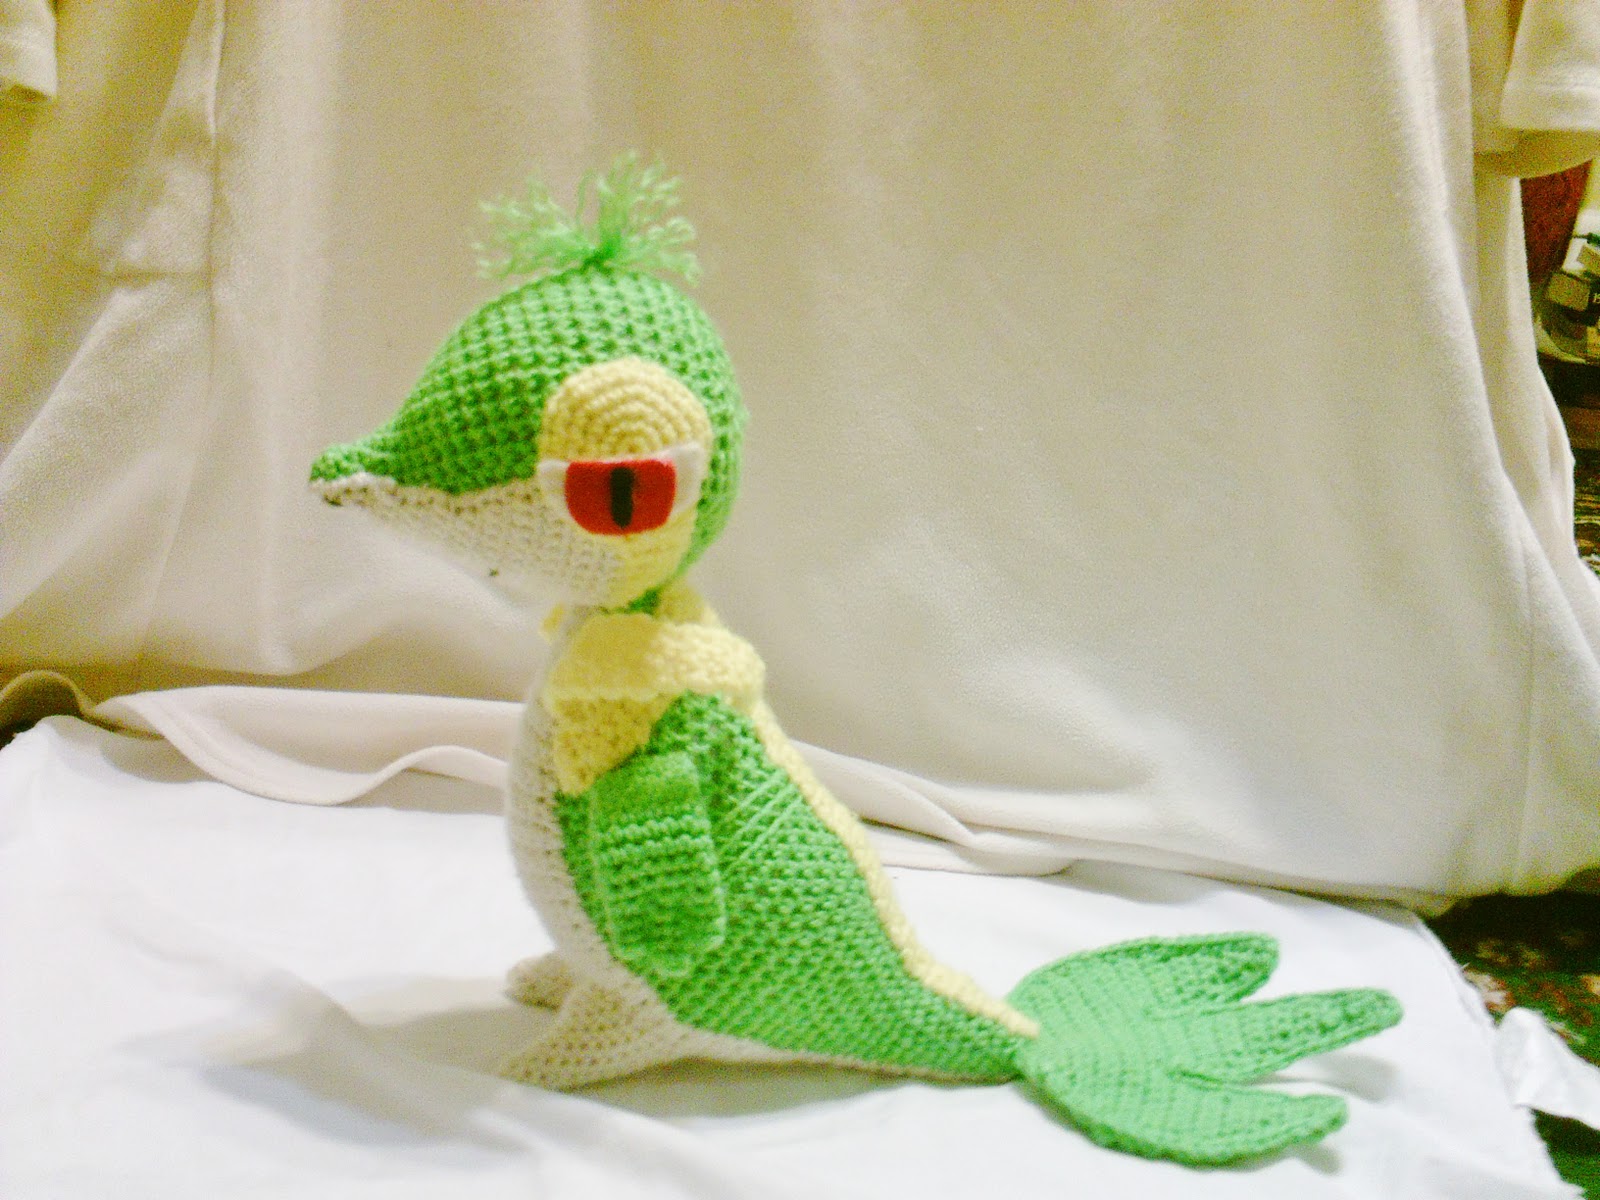
The Grass-type Unova region starter, Snivy

So finally I finished Snivy! I've been working on him since Christmas and now he's all in one piece! Whooo-hoooo! Lol! So he was a little difficult to make, especially his chin and belly, but now he's finished I can finally sigh with relief and watch a movie or read a book. Well here he is! I hope you can understand my pattern and that your Snivy will turn out great! If you find any spelling mistakes or row/pattern mistakes please notify me by doing either of the following things:
1. Commenting on this post
2. Emailing me at my email address (on the right ------>)
3. Leaving a post on our Facebook page (there is a link also on the right -------->)
4. Or sending me a message on Ravelry (there's a link to my Ravelry page on the right! ---->)
Also if anyone does make a Snivy using this pattern, please show me a picture! I would love to see what others have done! That's all I'm gonna say! Now enjoy the pattern!
Snivy
Materials:
Worsted Weight yarn in Green, Yellow, and a creamy color (I used Red Heart Super Saver Spring Green, Bright Yellow, and Aran)
Size G (#6 or 4.00 mm) crochet hook
Yarn Needle
Felt in red, white, and black
Scissors
Polyester fiberfill (I just buy cheap pillows from the Dollar General and use those. I can get two pillows for $7 whereas the polyester fiberfill in craft stores can be $15 a bag!)
Notes:
Gauge isn't that important, just as long as your stitches are tight and the stuffing won't show through.
The ( ) at the end of each Round/Row indicate the number of stitches at the end of each Round/Row.
I work in continuous rounds (aka, spiral rounds), but if you prefer to join at the end of each round feel free to do so. I also decrease in front loops only. This makes the decrease less visible, or so I've heard.
If you don't know what a Magic Ring is here's an example: If the pattern says 6 sc in Magic Ring, for an alternative you can ch 2 and 6 sc in 2nd ch from hook and join stitches. I prefer Magic Ring because it makes the beginning hole close really tight so that stuffing won't fall out, but most people I try to teach have trouble making a Magic Rng. Just do whatever you feel most comfortable with. If you want to learn how to make a Magic Ring try this link. I make my Magic Ring this way and I taught my sister how to do it after a few days.
The small pieces (such as the stripes, the belly, and the chin) are quite difficult to make. If you have any questions please inform me by any of the above mentioned means.
Crochet terms used in this pattern:
1. sc -- Single Crochet
2. sl st -- Slip Stitch
3. hdc -- Half Double Crochet
4. dc -- Double crochet
5. dec -- Decrease over next 2 stitches
Don't get any of these techniques mixed up! I tried a pattern when I first learned how to crochet and it said "dc in next st" and I thought it meant dec! I completely messed it up!
Head: using green,
Rnd 1: 6 sc in Magic Ring (6)
Rnd 2-3: sc in each sc around (6)
Rnd 4: sc in 1 sc, 2 sc in next sc around (9)
Rnd 5: sc in each (9)
Rnd 6: sc in 2 sc, 2 sc in next sc around (12)
 Rnd 7: sc in 3 sc, 2 sc in next sc around (15)
Rnd 8: sc in 4 sc, 2 sc in next sc around (18)
Rnd 9: sc in 5 sc, 2 sc in next sc around (21)
Rnd 10: sc in 6 sc, 2 sc in next sc around (24)
Rnd 11: sc in 7 sc, 2 sc in next sc around (27)
Rnd 12: sc in 8 sc, 2 sc in next sc around (30)
Rnd 13: sc in 9 sc, 2 sc in next sc around (33)
Rnd 14: sc in 10 sc, 2 sc in next sc around (36)
Rnd 15: sc in 11 sc, 2 sc in next sc around (39)
Rnd 16: sc in 12 sc, 2 sc in next sc around (42)
Rnd 17-21: sc in each sc around (42)
Rnd 22: sc in 12 sc, dec over next 2 sc around (39)
Rnd 23: sc in 11 sc, dec over next 2 sc around (36)
Rnd 24: sc in 4 sc, dec over next 2 sc around (30)
Rnd 25: sc in 3 sc, dec over next 2 sc around (24)
Rnd 26: sc in 2 sc, dec over next 2 sc around (18)
Rnd 27: sc in 1 sc, dec over next 2 sc around (12)
Rnd 28: dec over next 2 sc around (6)
F/O, finish stuffing. Weave end in last round done and pull to close.
Chin: using cream or Aran, (Worked in rows. ch 1 at end of each row)
Row 1: ch 4, sc in 2nd ch from hook (3)
Row 2: 2 sc in first and last sc of row (5)
 Row 3: 2 sc in first and last sc of row (7)
Row 4: 2 sc in first and last sc of row (9)
Row 5: 2 sc in first and last sc of row (11)
Row 6-7: sc in each sc across (11)
Row 8: 2 sc in first and last sc of row (13)
Row 9: 2 sc in first and last sc of row (15)
Row 10: 2 sc in first and last sc of row (17)
Row 11: sc in each sc across (17)
Row 12: 2 sc in first and last sc of row (19)
Row 13: 2 sc in first and last sc of row (21)
Row 14: 2 sc in first and last sc of row (23)
Row 15: 2 sc in first and last sc of row (25)
Row 16: sc in each sc across (25)
Row 17: 2 sc in first and last sc of row (27)
Row 18-23: sc in each sc across (27)
F/O, weave in ends.
Eye Patches: (make 2) using yellow,
 Rnd 1: 6 sc in Magic Ring (6)
Rnd 2: 2 sc in each sc around (12)
Rnd 3: sc in 1 sc, 2 sc in next sc around (18)
Rnd 4: sc in 2 sc, 2 sc in each sc around (24)
Rnd 5: sc in 3 sc, 2 sc in next sc around (30)
From this point on you'll be working in rows instead of rounds. This will make the pointy bit of the eye patches.
Row 6: sc in next 4 sc (4), ch 1 and turn
Row 7: sc in 3 sc, sl st in next sc(4) DON'T CH 1, turn
Row 8: sl st in first st, sc in next 3 sc (4) ch 1, turn
Row 9: sc in next 2 sc, dec over last 2 sc of row (3) DON'T CH 1, turn
Row 10: sl st in first st, sc in next 2 sc (3) ch 1, turn
Row 11: sc in 2 sc, sl st in last (3) DON'T CH 1, turn
Row 12: dec over first 2 sc, sc in last (2) ch 1, turn
Row 13: sc in first st, sl st in last (2) DON'T CH 1, turn
Row 14: dec over next 2 sc (1) ch 1, turn
Row 15: sc in st (1) DON'T CH 1, turn
Row 16: sl st in st (1) ch 1, turn
Row 17: sc in st (1)
F/O, weave in ends.
Body: using green,
Rnd 1: 6 sc in Magic Ring (6)
Rnd 2: sc in 1 sc, 2 sc in next sc around (9)
Rnd 3-4: sc in ach sc around (9)
Rnd 5: sc in 2 sc, 2 sc in next sc around (12)
Rnd 6-7: sc in each sc around (12)

Rnd 8: sc in 3 sc, 2 sc in next sc around (15)
Rnd 9-10: sc in each sc around (15)
Rnd 11: sc in 4 sc, 2 sc in next sc around (18)
Rnd 12-13: sc in each sc around (18)
Rnd 14: sc in 5 sc, 2 sc in next sc around (21)
Rnd 15-16: sc in each sc around (21)
Rnd 17: sc in 6 sc, 2 sc in next sc around (24)
Rnd 18: sc in 7 sc, 2 sc in next sc around (27)
Begin stuffing tail end moderately, so that it will hold the tail leaf but is still manuverable.
Rnd 19: sc in 8 sc, 2 sc in next sc around (30)
Rnd 20: sc in 4 sc, 2 sc in next sc around (36)
Rnd 21: sc in each sc around (36)
Rnd 22: sc in 5 sc, 2 sc in next sc around (42)
Rnd 23-27: sc in each sc around (42)
Rnd 28: sc in next 23 sc, leaving remaining 19 st unworked (23) DO NOT CH 1, turn
Rnd 29-31: working in front loops only, sc in each sc across (23) DO NOT CH 1, turn
Rnd 32: sc in front loops only of each sc across, then sc in back loops only of the 19 unworked sts (42)
You are now working in a circle again. Note: When you've finished making the body there will be two holes on each side of it. I went back and sewed them shut.
You are now working in a circle again. Note: When you've finished making the body there will be two holes on each side of it. I went back and sewed them shut.
Rnd 33: working in front loops only, sc in next 23 sc, then working in back loops only, sc in last 19 sc (42)
Rnd 34-37: Repeat rows 28-31 (23)
Rnd 38: sc in front loops only of each sc across, then sc in back loops only of the 19 unworked sts (42)
You are now working in a circle again.
You are now working in a circle again.
Rnd 39: working in both loops again, sc in 5 sc, dec over next 2 sc around (36)
Rnd 40: sc in each sc around (36)
Rnd 41: sc in 4 sc, dec over next 2 sc around (30)
Rnd 42: sc in each sc around (30)
Rnd 43: sc in 3 sc, dec over next 2 sc around (24)
Rnd 44: sc in each sc around (24)
Rnd 45: sc in 2 sc, dec over next 2 sc around (18)
Rnd 46-47: sc in each sc around (18)
Rnd 48: sc in 1 sc, dec over next 2 sc around (12)
Rnd 49-51: sc in each sc around (12)
F/O. Leave neck opening and weave in ends.
Belly: using cream or Aran, Note: Ch 1 at end of each row unless otherwise mentioned!
Row 1: ch 7, sc in 2nd ch from hook and each ch across (6)
Row 1: ch 7, sc in 2nd ch from hook and each ch across (6)
Row 2: sc in each sc across (6)
Row 3: 2 sc in first and last sc of row (8)
Row 4-7: sc in each sc across (8)
 Row 8: 2 sc in first and last sc of row (10)
Row 9-12: sc in each sc across (10)
Row 13: 2 sc in first and last sc of row (12)
Row 14-15: sc in each sc across (12)
Row 16: 2 sc in first and last sc of row (14)
Row 17-18: sc in each sc across (14)
Row 19: 2 sc in first and last sc of row (16)
Row 20-43: sc in each sc across (16)
Row 44: dec over 2 sc in first and last sc of row (14)
Row 45: dec over 2 sc in first and last sc of row (12)
Row 46: sc in each sc across (12)
Row 47: dec over 2 sc in first and last sc of row (10)
Row 48: dec over 2 sc in first and last sc of row (8)
Row 49: sc in each sc across (8)
Row 50: dec over 2 sc in first and last sc of row (6)
Row 51-53: sc in each sc across (6)
Row 54: dec over 2 sc in first and last sc of row (4)
Row 55-58: sc in each sc across (4)
Row 59: dec over 2 sc twice (2)
Row 60-61: sc in each sc across (2)
Row 62: dec over 2 sc (1)
Row 63-64: sc in sc (1)
F/O, weave in ends.
Back Stripe: using yellow,
Row 1: ch 2, 2 sc in 2nd ch from hook and each ch across (2)
Row 2: 2 sc in each sc across (4)
 Row 3: sc in each sc across (4)
Row 4: 2 sc in first and last sc of row (6)
Row 5: 2 sc in first and last sc of row (8)
Row 6-7: sc in each sc across (8)
Row 8: dec over 2 sc in first and last sc of row (6)
Row 9: dec over 2 sc in first and last sc of row (4)
Row 10: sc in 1st sc, dec over next 2 sc, sc in last sc (3)
Row 11-35: sc in each sc across (3)
Row 36: dec over first 2 sc, sc in last sc (2)
Row 37-41: sc in each sc across (2)
Row 42: dec over 2 sc (1)
Row 43-47: sc in each sc across (1)
F/O, weave in ends.


Side Stripes: (make 2) using yellow,
Row 1: ch 4, sc in 2nd ch from hook and each ch across (3)
Row 2-6: sc in each sc across (3)
Row 7: sc in 2 sc, hdc in last sc (3)
Row 8: dc in 1st sc, sc in next 2 sc (3)
Row 9: sc in 2 sc, dc in last sc (3)
Row 10: hdc in 1 sc, sc in next, sl st in last sc (3)
F/O, weave in ends. Turn one stripe so that it faces the right way on the other side of the body.

Collar: (make 2) using yellow,
Row 1: ch 5, sc in 2nd ch from hook and each ch across (4)
Row 2-12: sc in each sc across (4)
Row 13: sc in first sc, dec over next 2 sc, sc in last sc (3)
Row 14-18: sc in each sc across (3)
Row 19: sc in first sc, dec over next 2 sc (2)
Row 20-22: sc in each sc across (2)
Row 23: dec over next 2 sc (1)
Row 24-25: sc in each sc across (1)
F/O. Cut long tail so that you can weave it down the collar and into the body at the base of the collar.
Arms: (make 2) using green,
Rnd 1: ch 7. sc in 2nd ch from hook and each ch across. DO NOT TURN, but continue working in other side of foundation chain. (12)
Rnd 2-10: sc in each sc around (12)
 *DO NOT F/O!!!
Begin first 'finger': Flatten arm "end" matching up your sc stitches.
*DO NOT F/O!!!
Begin first 'finger': Flatten arm "end" matching up your sc stitches.
 *DO NOT F/O!!!
Rnd 1: sc in next 2 sc. Turn your work so the other side is facing you, sc in next 2 sc of OTHER SIDE OF ARM and join with sl st to 1st sc of 'finger'. (4)
Rnd 2-4: sc in each sc around (4)
F/O, weave in ends and pull to close.
Middle finger: attach yarn to 1st stitch immediately to left of finished finger. sc in same st and follow Rnds 1-4 of first finger. (4)
F/O, weave in ends and pull to close.
Middle finger: attach yarn to 1st stitch immediately to left of finished finger. sc in same st and follow Rnds 1-4 of first finger. (4)
Rnd 5: sc in each sc around (4)
F/O, weave in ends and pull to close.
Last finger: Repeat instructions for first finger.
Feet: (make 2) using cream or Aran,
F/O, weave in ends and pull to close.
Last finger: Repeat instructions for first finger.
Feet: (make 2) using cream or Aran,
 Rnd 1: 6 sc in Magic Ring (6)
Rnd 2-3: sc in each sc around (6)
Rnd 4: sc in 2 sc, 2 sc in next sc around (8)
Rnd 5: sc in each sc around (8)Rnd 6: sc in 3 sc, 2 sc in enxt sc around (10)
Rnd 7: sc in each sc around (10)
Rnd 8: sc in 4 sc, 2 sc in next sc around (12)
Rnd 9: sc in 5 sc, 2 sc in next sc around (14)
Rnd 10: sc in 6 sc, 2 sc in next sc around (16)
Rnd 11: sc in 7 sc, 2 sc in next sc around (18)
Rnd 12: sc in each sc around (18)
F/O, weave in ends. Stuff moderately firmly to keep him/her standing upright but still be cuddly.
Tail Leaf: (make 2) using green,
Row 1: ch 16, sc in 2nd ch from hook and each ch across (15)
Row 2-4: 2 sc in first and last sc of Rnd (17 at end of Rnd 2, 19 at end of Rnd 3, 21 at at end of Rnd 4)
Row 5-9: sc in each sc across (21) DO NOT F/O!!
Begin first point:
Row 1: sc in next 7 sc, leave remaining 14 sts unworked (7) ch 1, turn
Row 2-4: sc in each sc across (7)
Row 5: dec over first 2 sc, sc in nxt 3 sc, dec over last 2 sc (5)
Row 6-7: sc in each ac across (5)
Row 8: dec over first 2 sc, sc in next sc, dec over last 2 sc (3)
Row 9-10: sc in each sc across (3)
Row 11: dec over next 2 sc, sc in last sc (2)
 Row 12: dec over next 2 sc (1)
F/O, weave in ends.
Middle point:
Row 1: Attach yarn to left of finished point. Sc in same st and in next 6 sc (7) ch 1, turn
Row 2-5: sc in each sc across (7)
Row 6: dec over first 2 sc, sc in next 3 sc, dec over last 2 sc (5)
Row 7-9: sc in each sc across (5)
Row 10: dec over first 2 sc, sc in next sc, dec over last 2 sc (3)
Row 11-13: sc in each sc across (3)
Row 14: dec over next 2 sc, sc in last sc (2)
Row 15: sc in each sc across (2)
Row 16: dec over next 2 sc (1)
Row 17: sc (1)
F/O, weave in ends.
Last Point:
Attach yarn to left of middle point and follow instructions for first point.
Tail Assembly:
Lay one tail leaf on top of the other and sc around the edge of both of them put together. 3 sc on tip of end points and 2 sc on tip of middle point.

Final Assembly:
I sewed the body parts in this order:
1. Chin to head
2. Eye patches to head
3. Belly to body
4. Head to body
5. Back Stripe to body
6. Side Stripes to body
7. Feet to body
8. Collar to body
9. Arms to body
10. And lastly the Tail Leaf.
 I sewed the tail on last to prevent bending it and making it flimsy, but it turned out flimsy anyway. You can sew them in this order if you like, or sew them on however you want to.
Cut the white, red, and black parts of the eyes out of felt. I like to draw the eyes on a piece of paper and color it in before cutting the felt to prevent using too much or wasting it. Hey, felt's expensive to me! Embroider a mouth and nostrils on his chin and his face is done!
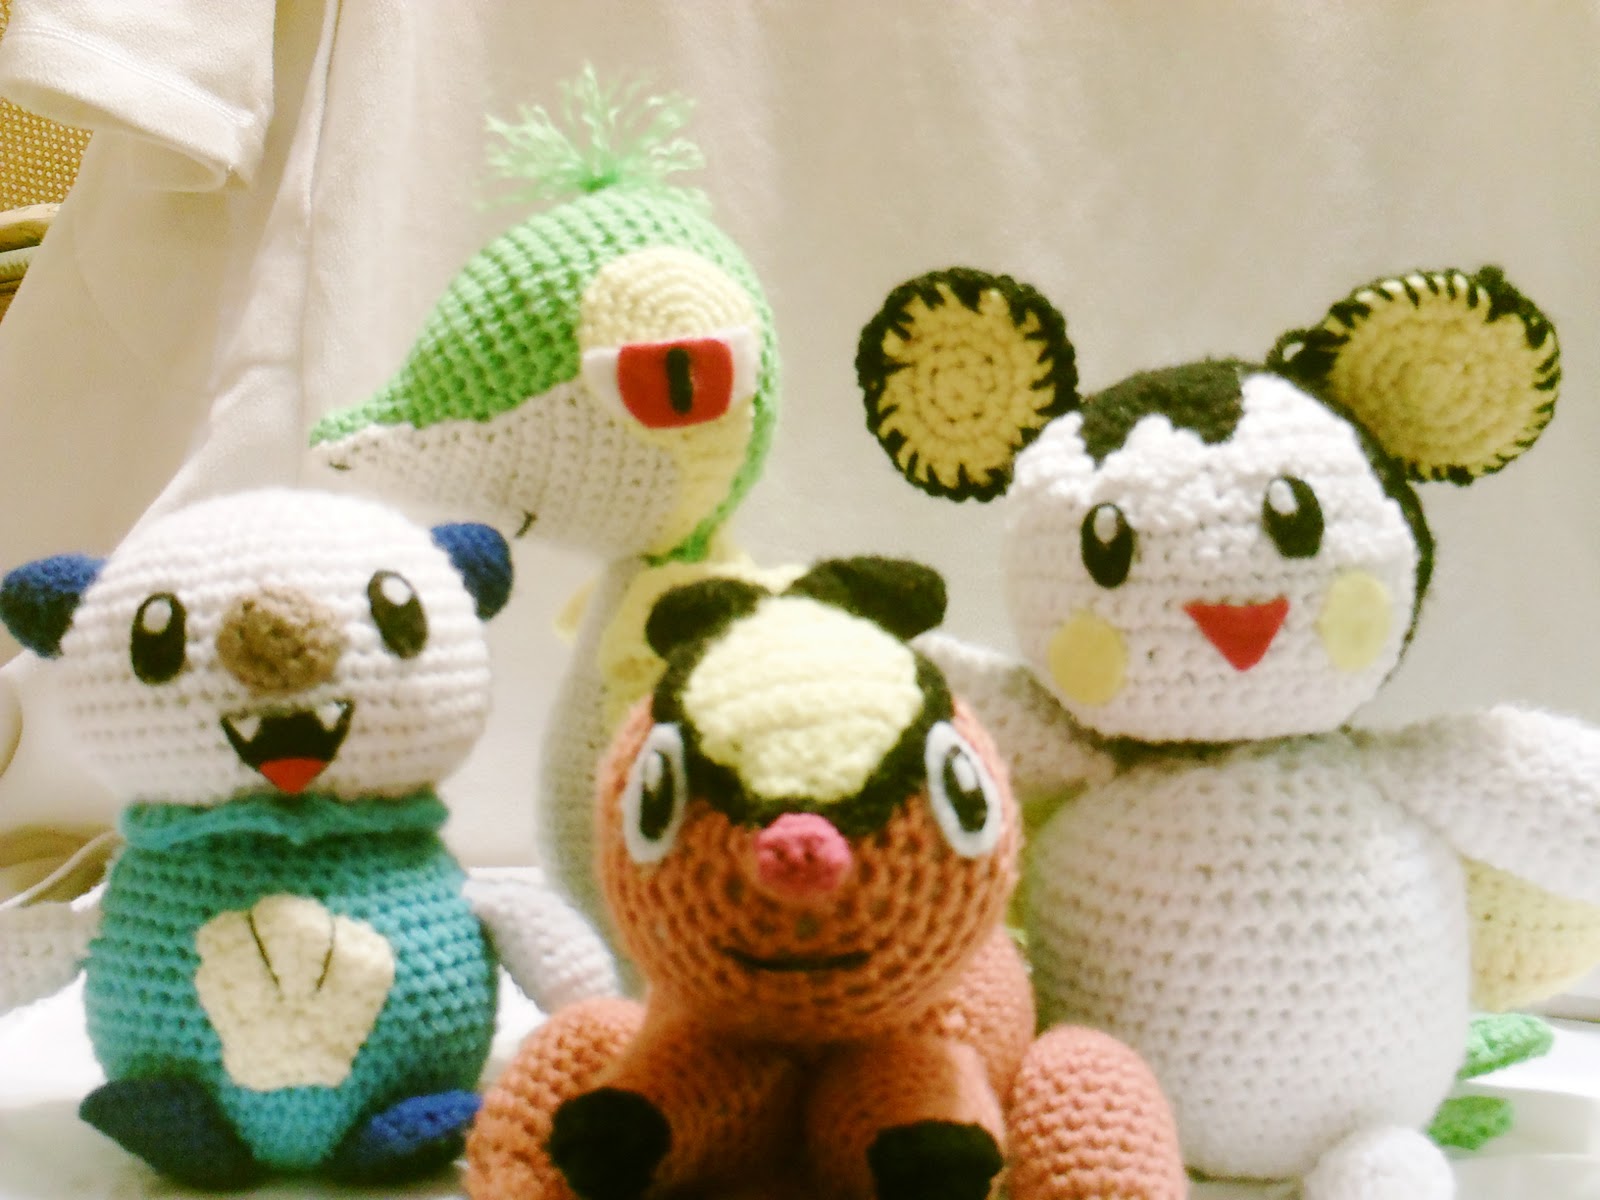
I added hair to mine (a mohawk) because he looked bald without it. You can accessorize him however you want to! Enjoy you new Snivy! There are also patterns for Tepig, Emolga, Oshawott out there! Click on their names for the links! Make a whole clan of Pokemon!! YEEEAAAAHHH!

Snivy, Tepig, Oshawott, Emolga, and Pokémon are © Nintendo.
Saturday, January 14, 2012
Snivy Update!
Hey guys what's up? Sorry I haven't spoken in a while, I've been kinda busy. My friend is planning a Harry Potter birthday party and I've been frantically trying to knit a present for him before the party. I would tell you what I'm making, but knowing my luck he'll probably look at my blog!
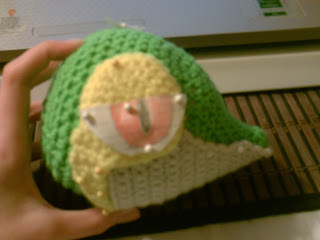
Snivy is coming along very well. His head and head accessories are finished, and now I'm working on his belly plate. Then all that's left is his feet and the sewing part! I will be so relieved! I tried putting Snivy's head together and this is how it turned out:

I can't believe how good he looks! The eye is temporary of course, but he still looks like the real thing. Now that I know he looks genuine, I can relax and continue crocheting his belly plate. Hope you all had a good New Year and that the rest of your year is great!
Subscribe to:
Posts (Atom)